Mounting a rear bike rack is easy, which can help improve your bicycle’s stability. So how to attach a rear bike rack without eyelets?
Attaching a rear bike rack using a U-bolt or quick-release skewer instead of the eyelets. If you don’t already have these tools, you could easily order some from any hardware store or online. Once you have your U-bolt and prepped the area for mounting, use a wrench to tighten it down with a torque wrench.
Today I want to show you how to attach a bike rack to your car, truck, or SUV. Let’s find out which is right for you!
The Different Types Of Bike Racks
The type of bike rack you need depends on the type of car you have and how much storage space you have.
- Trunk Mount Bike Rack
The trunk mount bike rack attaches to the trunk of your car and stores your bike on the back of your car. This bike rack is suitable for cars with a lot of trunk space, but it can be difficult to access your trunk when the bike rack is attached.
- Hitch Mount Bike Rack
This rack provides a hitch on the back of your car. Because it stores your bike on the side of your car, it is suitable for cars with small or no trunk space.
- Roof Mount Bike Rack
The roof mount bike rack attaches to the roof of your car and stores your bike on the roof of your car. You can use it when your car has a lot of roof space.
How To Install A Rear Bike Rack?
In general, the installation process for a rear bike rack consists of four steps:
- Attaching The Bike Rack To The Car
First, attach the bike rack to the car’s frame. Find some eyelets near one of the wheel tracks on your car, and then mount the two bolts that come with your bike rack onto these eyelets. Tighten them, so they are secure.
- Attaching Bike To The Rack
Once you have done step one, you need to attach the bikes to your chassis. If you are using a hanging-style bike rack, you will have to remove the seats of your bikes and then attach them to the hooks that come with your bike rack. Now tighten the clamps, so they are secured.
- Adjusting The Bike Rack To The Correct Height
Once you have done these two steps, the next step is to tilt the bike rack upwards by using the lever. It would help if you adjusted the bike rack’s height to a point where your bikes are at eye level. Once you have set everything up according to your height, you can now drive knowing that your bikes are safe on this bike rack.
- Tightening The Straps Or Bolts That Hold The Bike Rack In Place
After completing all the above steps, you should tighten down the straps or bolts that hold your bike rack in place. It will prevent the bike rack from slipping out of place while in use.
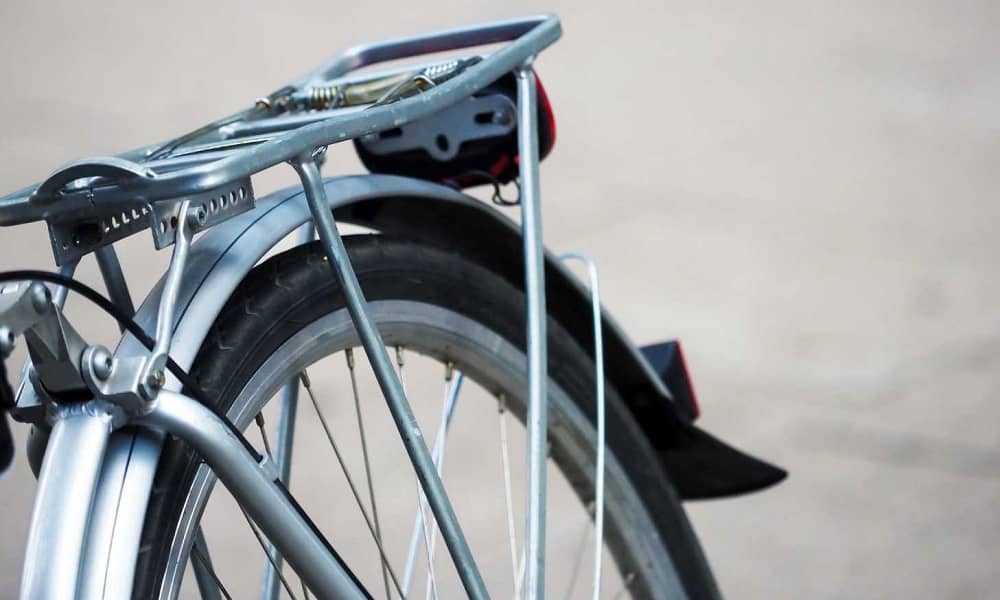
How To Attach A Bike Rack Without Eyelet?
When transporting your bike, there are many different options to choose from. The most popular option is using a bike rack. Bike racks come in all shapes and sizes, and you can mount them to your vehicle’s roof, trunk, or hitch. However, not all vehicles have pre-installed eyelets for mounting a bike rack. If your vehicle does not have pre-installed eyelets, don’t worry! You can still use a bike rack by using a few simple techniques.
- Step-1: Think About The Weight Capacity
Next, you’ll need to determine the weight capacity of the bike rack. It is important because you don’t want the bike rack to fail under the weight of your bike.
- Step-2: Choose The Perfect Rack
Once you’ve found a place to mount the bike rack, you’ll need to determine the appropriate size and type of bike rack for your vehicle. There are many different bike rack styles to choose from. You’ll also need to choose a bike rack that is the correct size for your vehicle.
- Step-3: Mount The Bike Rack
The first thing you’ll need to do is find a place to mount the bike rack. It could be a roof rack, trunk rack, or hitch rack. If you’re using a roof rack, you’ll need to find a way to secure the rack to your vehicle. It could be done with roof rack straps or a roof rack system that uses towers and clips.
- Step-4: Secure Your Rack
If you’re using a trunk rack or hitch rack, you’ll need to find a way to secure the rack to your vehicle. You can do it with trunk rack straps or a hitch rack system that uses a locking hitch pin.
- Step-4: Install the Bike Rack
The final step is actually to install the bike rack. It will vary depending on the type of bike rack you are using. For example, if you use a roof rack, you’ll need to install the straps. You’ll need to install the straps if you use a trunk rack. And if you are using a hitch rack, you’ll need to install the hitch rack system.
- Step-6. Attach Your Bike In The Rack
Once you install the bike rack, you can then attach your bike to the rack. It will vary depending on the type of bike rack you are using. For example, if you use a roof rack, you’ll need to attach the bike to the rack using the bike rack’s included straps. If you are using a trunk rack, you’ll need to attach the bike to the rack with straps.
How To Find The Right Rear Bike Rack For Your Bike?
If you’re looking for a rack for a mountain bike, then a crossbar mounted rack is the way to go. It allows you to put your rear wheel close to the center of the frame. So your wheel will remain secure if there is any side wind.
There are many different styles of bike racks out there. You need to know your needs and what bike you own to ensure you get the right one. Here I have explained a few of them:
- Crossbar Mounted Rack
A bolt-on model will also work, but some riders prefer a bracket that can be adjusted more quickly than a bolt-on model would allow. You can use Crossbar mounted racks with a crossbar, and two bike racks are attached to your car’s rear.
Or you can use a pair of bike hooks that mount at the front and rear of the frame. An adjustable rack is great because it can adapt to your wheels and frames. So whether you have a small Trek or giant mountain bike, there will always be a rack that fits.
- Hitch Mounted Rack
A hitch-mounted rack allows greater movement freedom when loading and unloading bikes. The type best for you depends on the length of your car and the carrying capacity needed. A rack that hangs from the rear end is often better than one that attaches to your roof.
- Trunk-Mounted Bike Rack
A trunk-mounted bike rack can be either a hitch bike rack or a two-bike rack. Trunk-mounted bike racks are easy to attach and remove and hold your bikes firmly in place during transport.
You can also take this for cars with little storage space in the rear area. SUVs, mini-vans, and other vehicles with ample cargo space may require a more extensive bike rack.
It allows you to carry more bikes or transport more gear while protecting your vehicle’s finish from scratches. A front-wheel-mounted bike rack is designed to allow the cyclist easy access to the vehicle’s cab. So choose the best one according to your need.
How To Use A Rear Bike Rack?
A rear bike rack can be a beneficial addition to your bike, allowing you to carry extra gear on your rides. However, knowing how to properly use a rear bike rack can be tricky, primarily if you’ve never used one before.
Here’s a guide to using a rear bike rack:
1. You’ll need to decide which type of rear bike rack to use. The trunk rack attaches to the trunk or back of your car and is the most accessible type of rack to use. The strap-on rack attaches to your bike’s frame, and the hitch rack attaches to your car’s hitch.
2. Once you’ve decided on the type of rack, you’ll need to measure your car to ensure the rack will fit. The trunk rack should be long enough to fit the entire length of your car, and the strap-on and hitch racks should be the right size to fit your car’s hitch.
3. Next, you’ll need to assemble the rack. The trunk rack comes assembled, but the strap-on and hitch racks require assembly. Follow the instructions carefully to make sure the rack is assembled correctly.
4. Once the rack is assembled, it’s time to attach your bike. The trunk rack has a U-shaped arm that goes over your bike, the strap-on rack has two straps that go around your bike, and the hitch rack has a cradle that holds your bike.
5. Make sure your bike is securely attached to the rack before you start driving. The trunk rack has a built-in security system to keep your bike safe, and the strap-on and hitch racks have locking mechanisms to keep your bike safe.
6. You’re ready to hit the road with your extra gear! Make sure you pack everything you need for your trip and enjoy the ride.
FAQs:
How do you put a rear bike rack on without eyelets?
There are a few different ways to do this, but we’ll show you how to do it using a rack that doesn’t have any eyelets.
Get yourself some rubber washers. You’ll need two per side. Then place the rubber washers over the bolts on your rack. Thread the bolts through the eyelets on your bike frame. After that, tighten the bolts on the rack and bike frame.
How do you attach a rear bike rack to a bike?
There are several ways to attach a rear bike rack to a bike. One way is to use a rack that clamps onto the seat post. Another way is to use a rack attached to the bike’s frame with bolts.
Can I put a rear rack on any bike?
Most of bikes, you can put a rear rack on the bike. For some models, it has not. If your bike does not have to braze on the mount, you can use C clips to add a rear rack.
How can I make my bike rack more secure?
You can use a cable lock to attach your bike to the rack. To make the bike more secure, use a locking hitch pin to secure the rack in your car. It will prevent someone from simply removing the rack from your car. You can also use a U-bike lock to make your bike rack more secure.
Final Words
Whether you are hiking, exploring nature, or want to spend a day in the mountains, you can always have your bike with you. But for that, you will have to attach a rear bike rack. Attaching a rear bike rack is a challenging task. It needs a lot of knowledge and skills.
If you are confused about installing or attaching a rear bike rack, feel free to contact us via commenting below the article. Hope you understand how to attach a rear bike rack without eyelets. Thanks!